How to Create a Telegram Echo Bot Using the GREEN-API in n8n#
Echo bot setup procedure:
Setup the GREEN-API application#
Setting up the GREEN-API application is described in detail in the Integration Setup section.
Create a scenario#
-
Create a workflow: click the
Build a workflowcard (on an empty account) or the+button in the upper-left corner.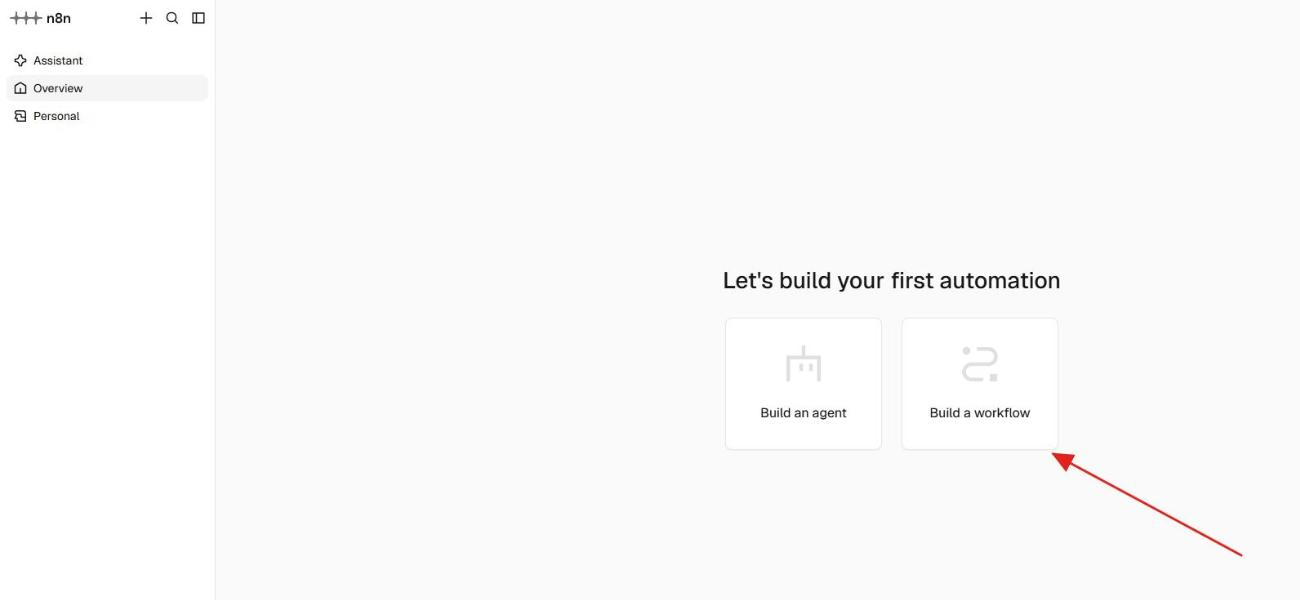
-
Click
Add first step...to open thenode panel. -
Find the
GREEN-API for Telegramnode.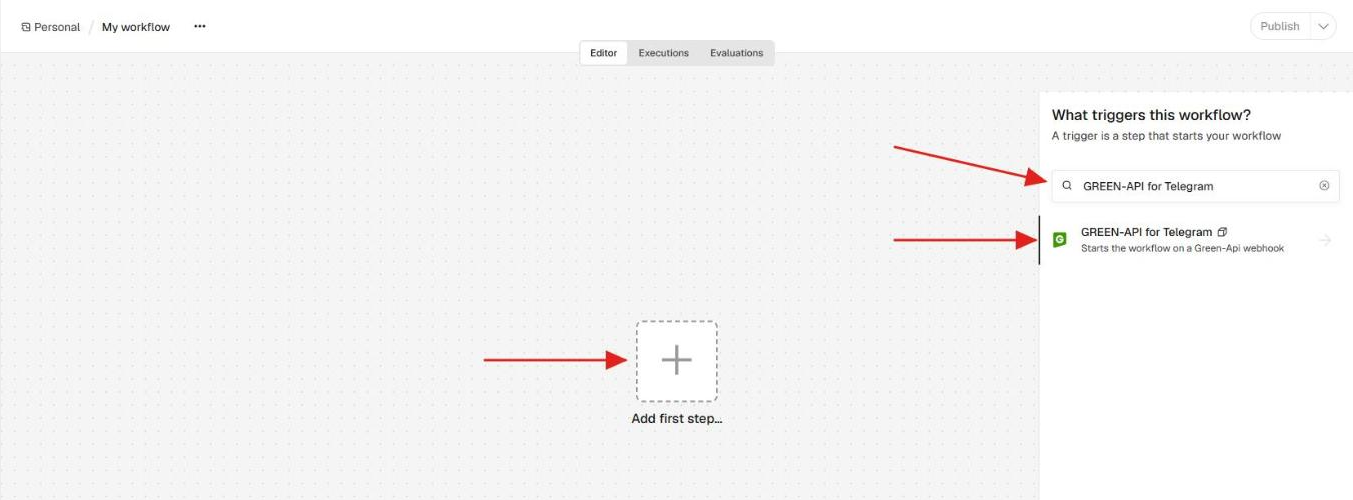
Setup receiving incoming messages#
To receive messages in n8n, you need to set up a trigger.
Trigger is the event that starts your scenario. For example, it could be a new message in Telegram, a new entry in Google Sheets, or something else.
Trigger setup procedure:
-
In the node card, select
On incoming messagein theTriggerssection (the scenario is run when a message is received). TheTrigger Onfield is already set toIncoming Messageby default. -
In the connection credential selection field, click
Connect to Green-API.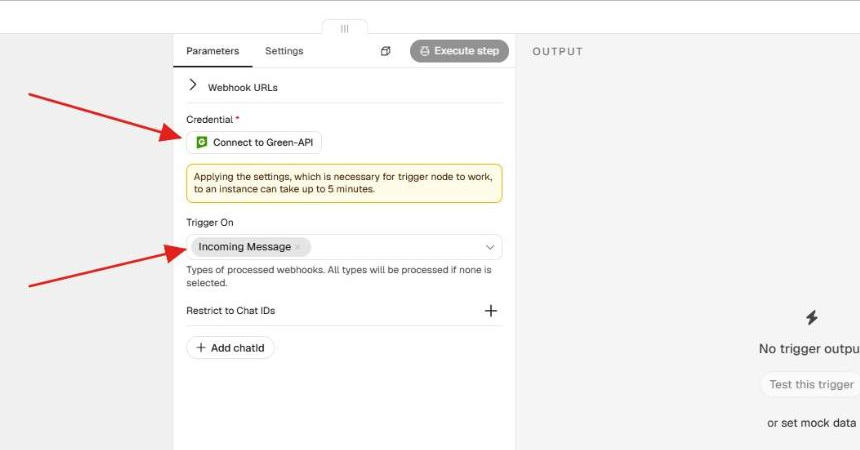
-
Enter
idInstanceandapiTokenInstancefrom the GREEN-API console into theidInstanceandapiTokenKeyfields respectively. Save your connection credentials by clickingSave.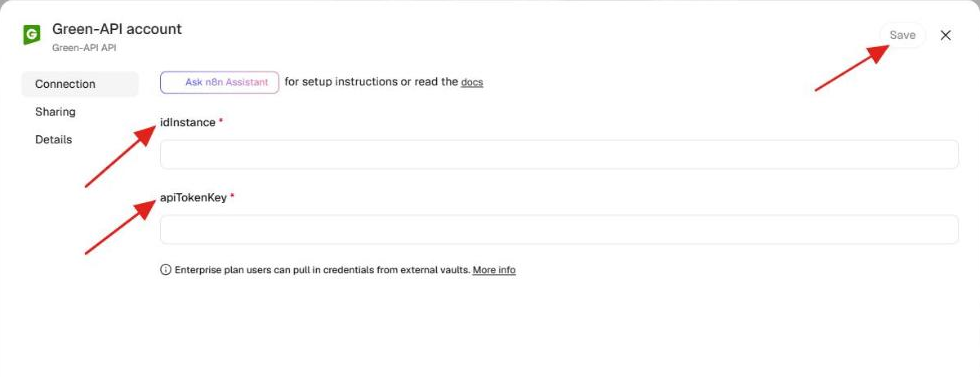
Applying the instance settings required for the trigger to work can take up to 5 minutes.
-
Go to the module settings, click
Execute step, and send a test webhook of theincomingMessageReceivedtype to your webhook'stestUrlto get sample data that will be used in the next module. Alternatively, send a test Telegram message to the account linked to the instance. The received data will be displayed inOUTPUT.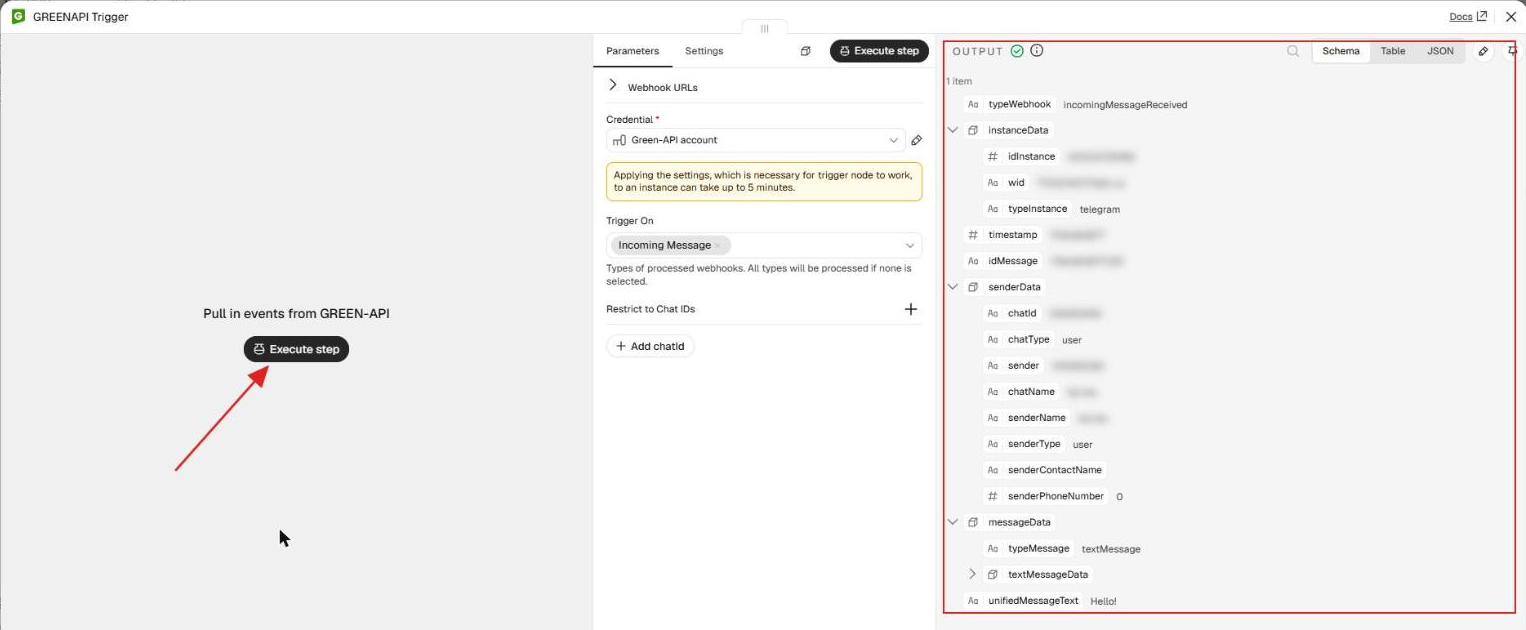
In Telegram,
chatIdis a number without the@c.ussuffix.
Send a message#
After setting up the receipt of incoming messages, you need to create an action that will respond to the user with the same text.
-
Click
+to the right of the trigger, find theGREEN-API for Telegramnode, and selectSend messagein theActionssection.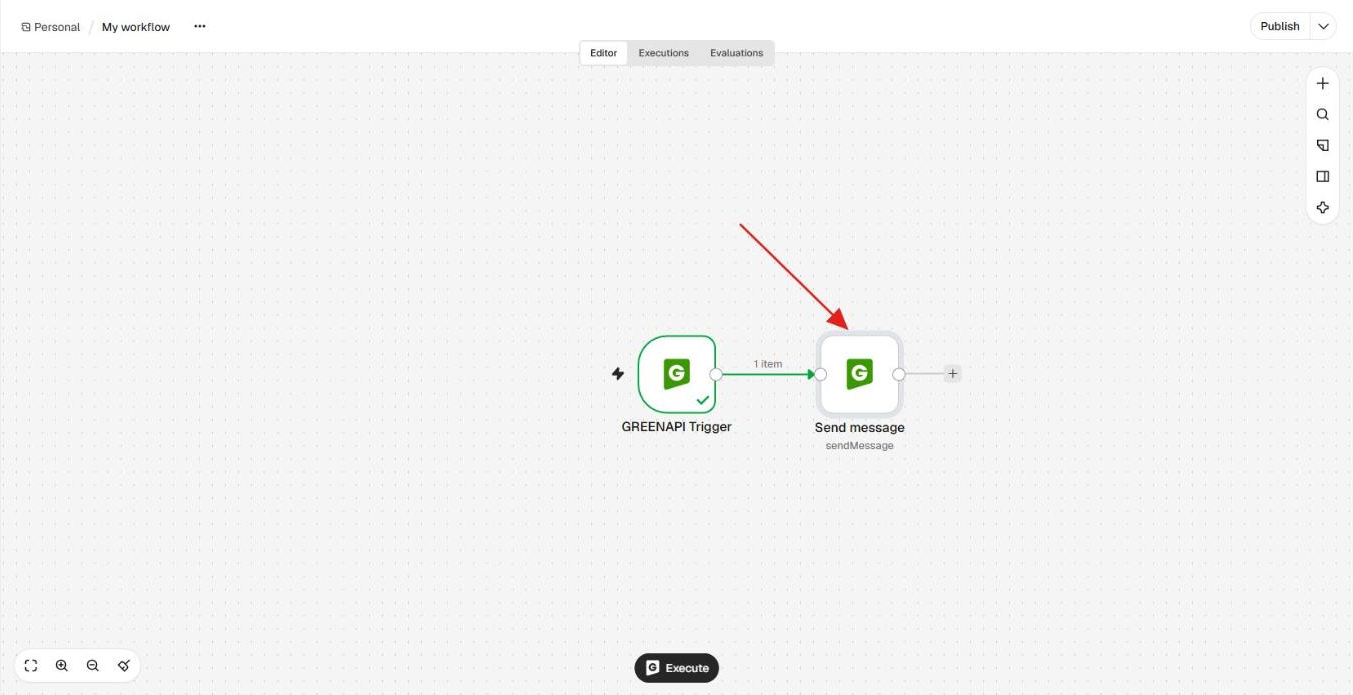
-
Use the data received in the webhook module,
senderData.chatIdandunifiedMessageText, to send a message. Drag them into the correspondingchatIdandMessagefields in theSend messagemodule parameters.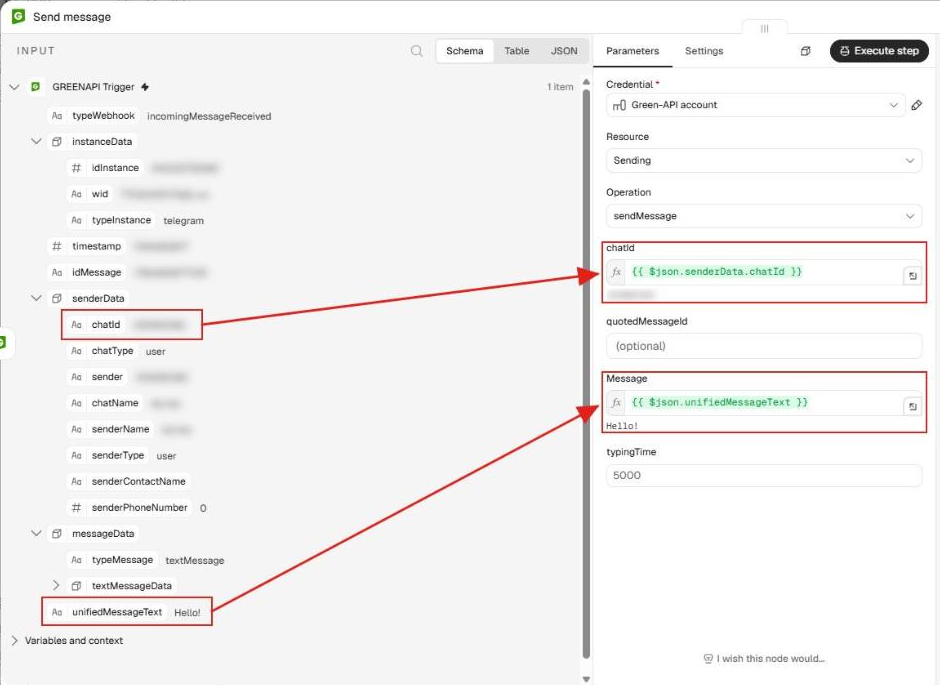
-
Publish the
Workflow: clickPublishin the upper-right corner and confirm by clickingPublishin thePublish workflowwindow. Once published, the button showsPublished.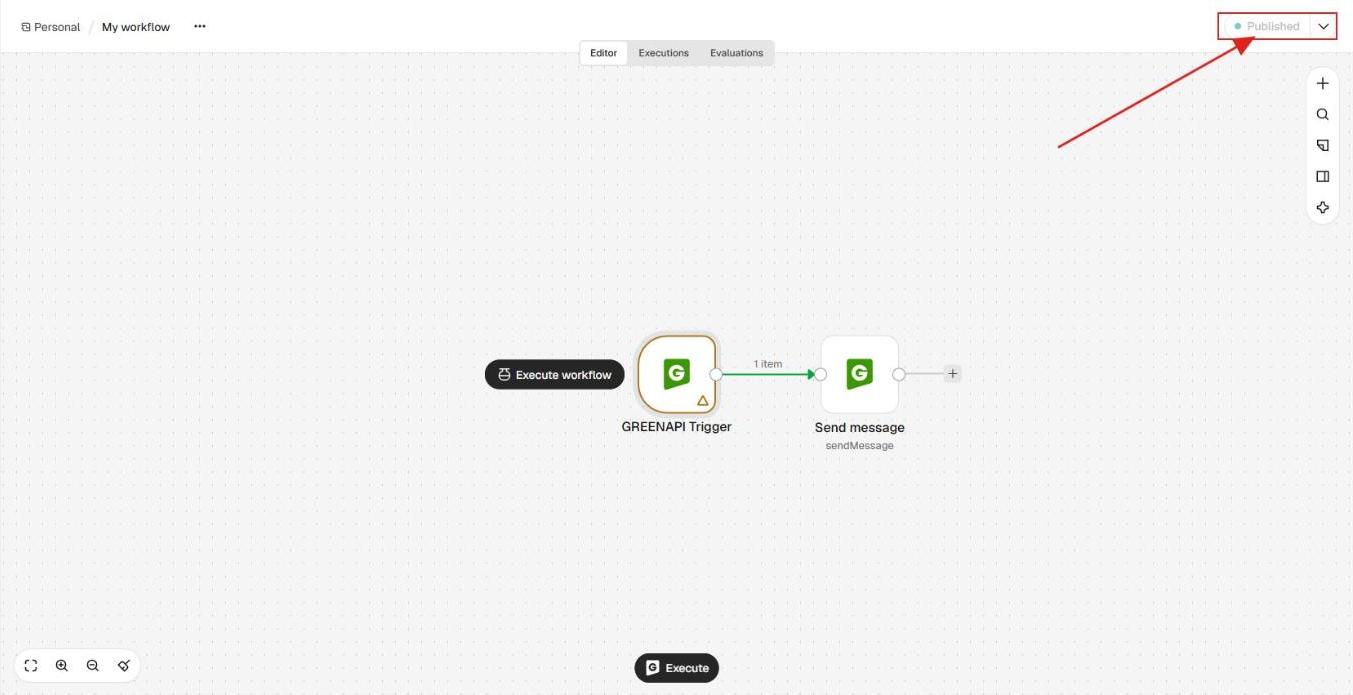
To stop the bot, click the arrow next to
Publishedand selectUnpublish.
This completes the bot setup. Now, when you send a message to the Telegram account linked to the instance, you'll receive a reply with the same content.