Integrating WhatsApp into Rocket.Chat with GREEN-API#
Want to combine the power of WhatsApp with the convenience of the Rocket.Chat platform? With our GREEN-API app it's easy!
In this guide, we'll show you how to install the app, register a workspace and agents, create and connect a GREEN-API instance to effectively work with WhatsApp directly from Rocket.Chat.
This is a short version of the instructions, if you need more details - watch our video.
Contents#
- Video guide
- Step 1. Installing the GREEN-API application
- Step 2. Creating a channel for managing WhatsApp
- Step 3. Obtaining a Personal Access Token
- Step 4. Registering a workspace
- Step 5. Registering an agent
- Step 6. Registering an agent in the integration
- Step 7. Creating a GREEN-API instance
- Step 8. Connecting the instance and getting started
- Conclusion
Video guide#
Step 1. Installing the GREEN-API application#
-
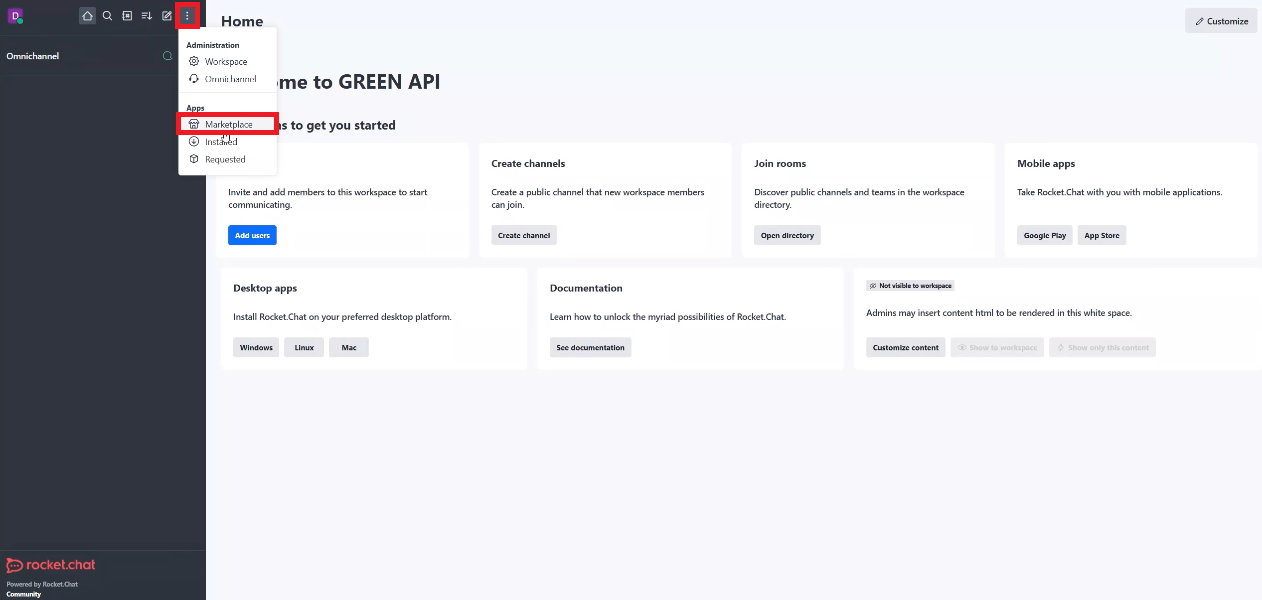
In Rocket.Chat, click on the three vertical dots in the menu and select “Marketplace”.
-
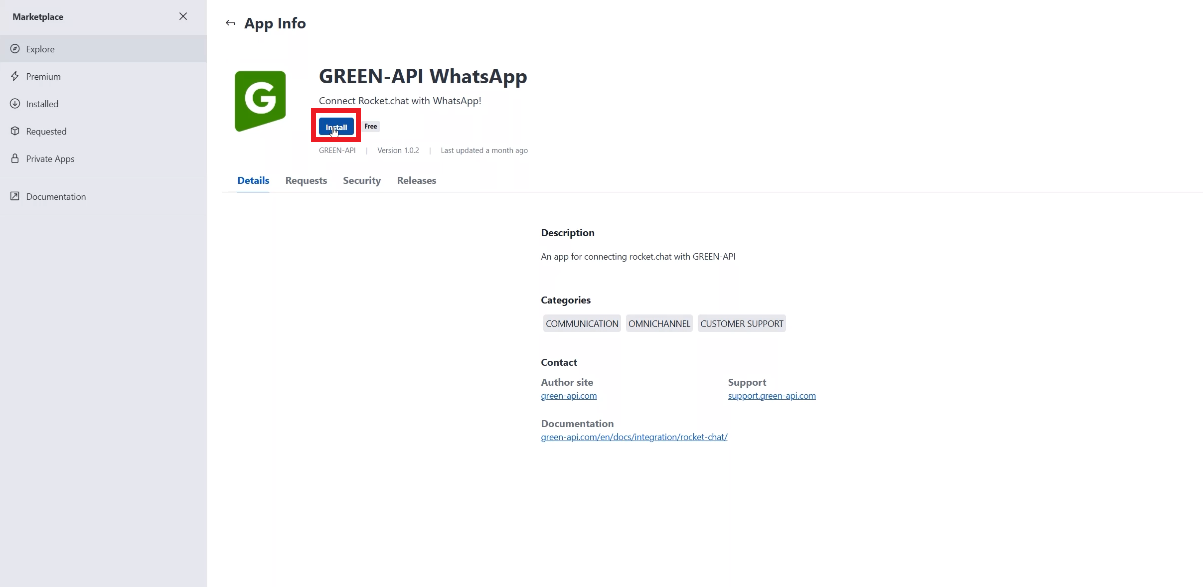
In the Marketplace search bar, enter “GREEN-API WhatsApp”.
-
Find the GREEN-API WhatsApp app in the search results, click on it and choose “Install”.
-
If your workspace uses the Community plan, a window with the terms and conditions will appear. Click “Next” and then “Agree” to continue the installation.
- After installation, you will see a notification in the upper right corner: “GREEN-API WhatsApp installed”.
Step 2. Creating a channel for managing WhatsApp#
- Go back to the main page of Rocket.Chat.
-
Click on the button to create a new channel.

-
Give the channel a name, for example “GREEN-API WhatsApp”. You can choose any name that is convenient for you.
Step 3. Obtaining a Personal Access Token#
-
Click on your profile icon in the upper left corner and select “Profile”.

-
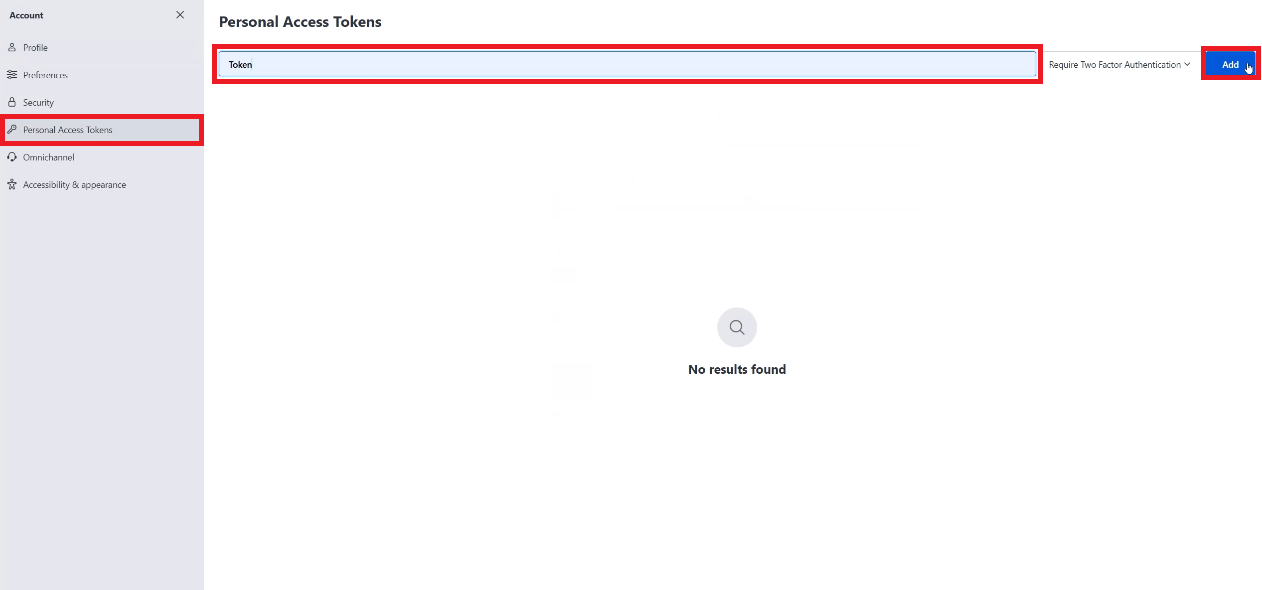
In the sidebar, select “Personal Access Tokens”.
- Create a token by clicking “Add”.
-
Enter a name for the token so that it can be easily identified.
-
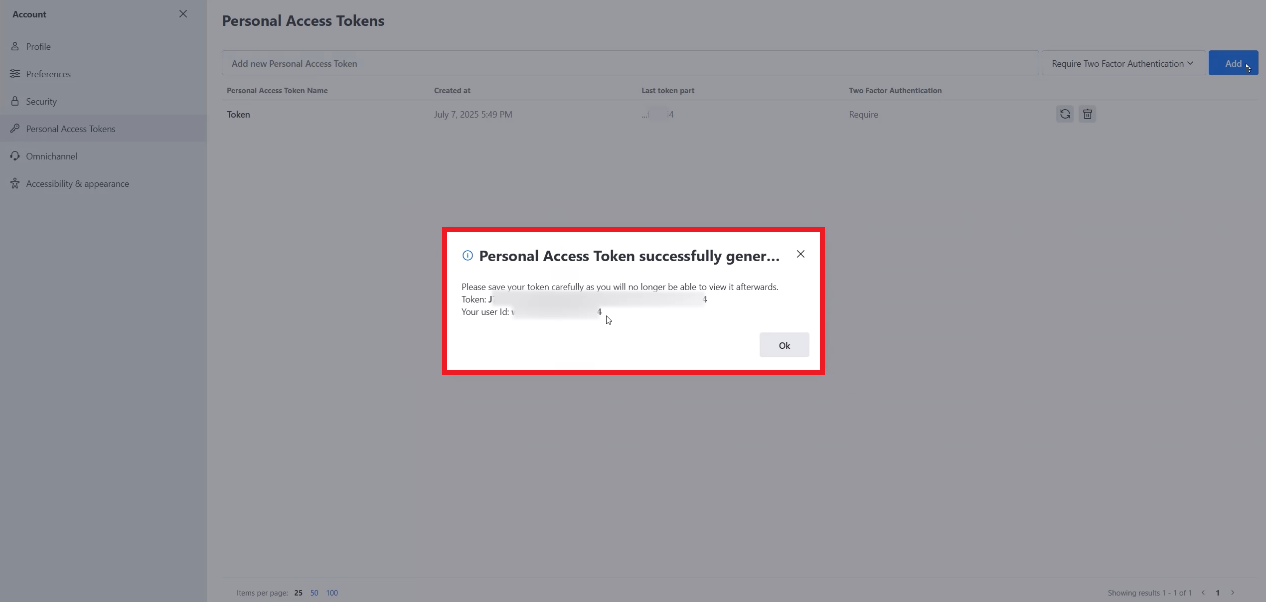
The system will ask for your password. Enter it and click “Verify”.
-
You will see your token and User ID. They will only be shown once, so be sure to save them in a safe place!
Step 4. Registering a workspace#
- Go back to the channel you created in Step 2.
-
Start typing the command
/to see a list of available commands. Select/greenapi.register-workspace.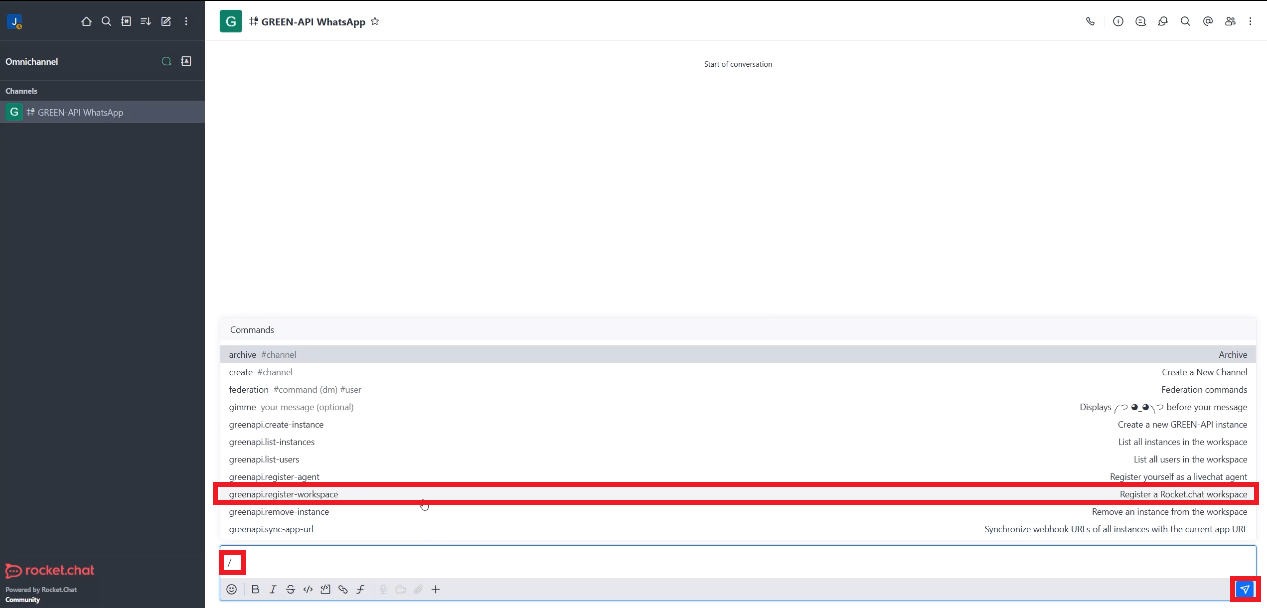
-
Enter the arguments:
- Enter your User ID (obtained in Step 3) as the first argument.
- Enter your Personal Access Token (obtained in Step 3) as the second argument.
Step 5. Registering an agent#
-
On the main page, click on the three vertical dots and select “Omnichannel”.

-
In the sidebar, select “Agents”.
- Enter the agent name in the “Username” field, select the desired agent and click “Add”.
-
To receive messages, the agent status must be “Available”.

Step 6. Registering an agent in the integration#
- Go back to the channel you created in Step 2.
-
Start typing the command
/to see a list of available commands. Select/greenapi.register-agent.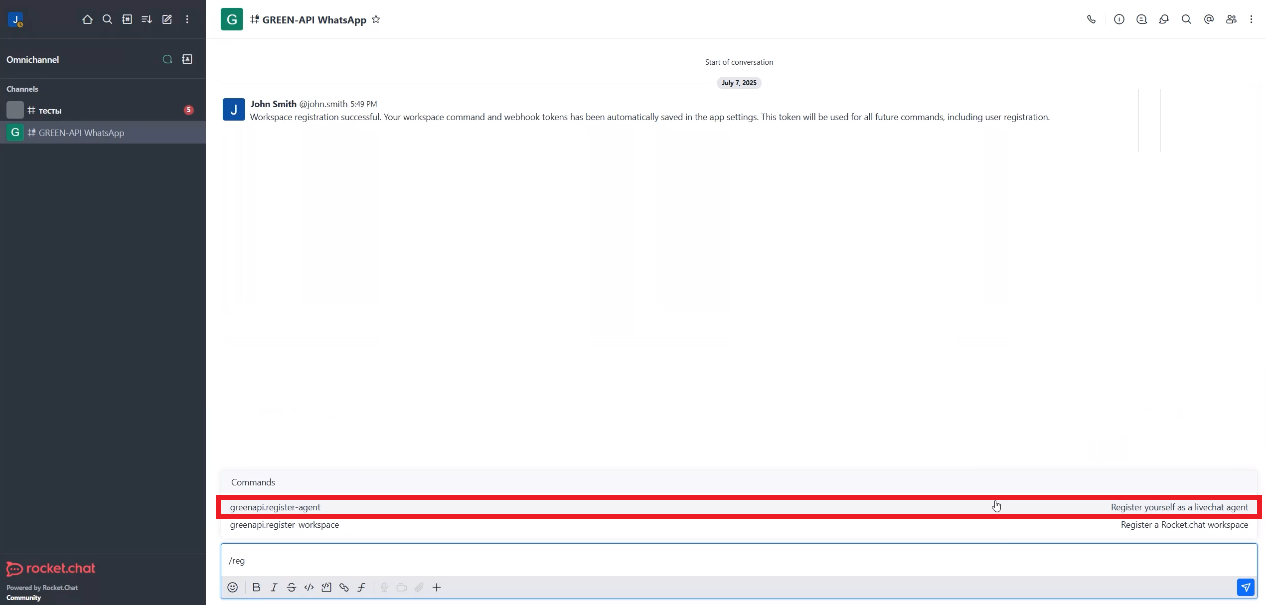
-
Enter the arguments:
- Enter your User ID (from the agent account) as the first argument.
- Enter your Personal Access Token (from the agent account) as the second argument.
Important: If the agent is also the workspace administrator, they can use the same User ID and Personal Access Token that they created as an administrator.
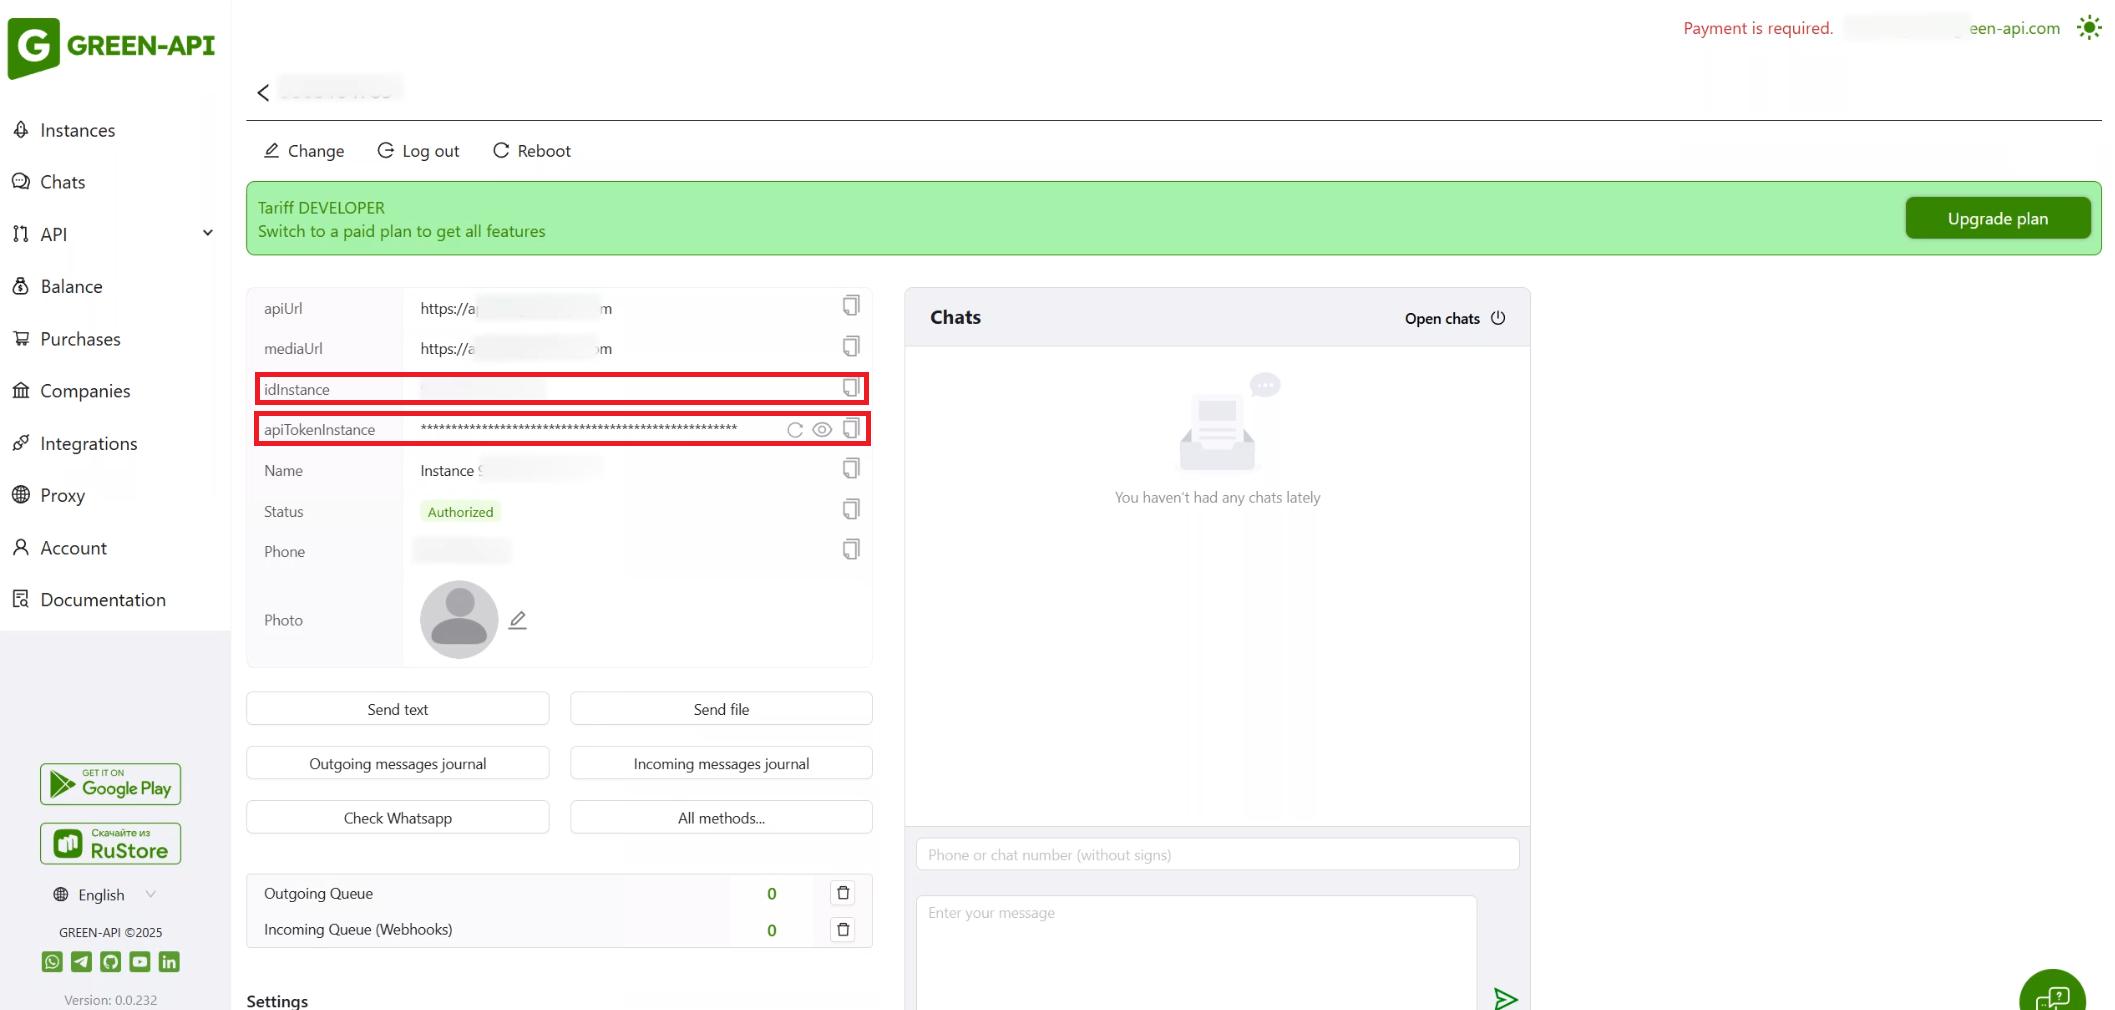
Step 7. Creating a GREEN-API instance#
-
Go to GREEN-API console. If you don't have an account, register and create your first instance. You will receive an instance ID and token. Each agent does not need to register separately. The administrator can create a single account and manage all instances there.
-
Go back to the channel created in Step 2.
-
Start typing the command
/to see the list of available commands. Select/greenapi.create-instance.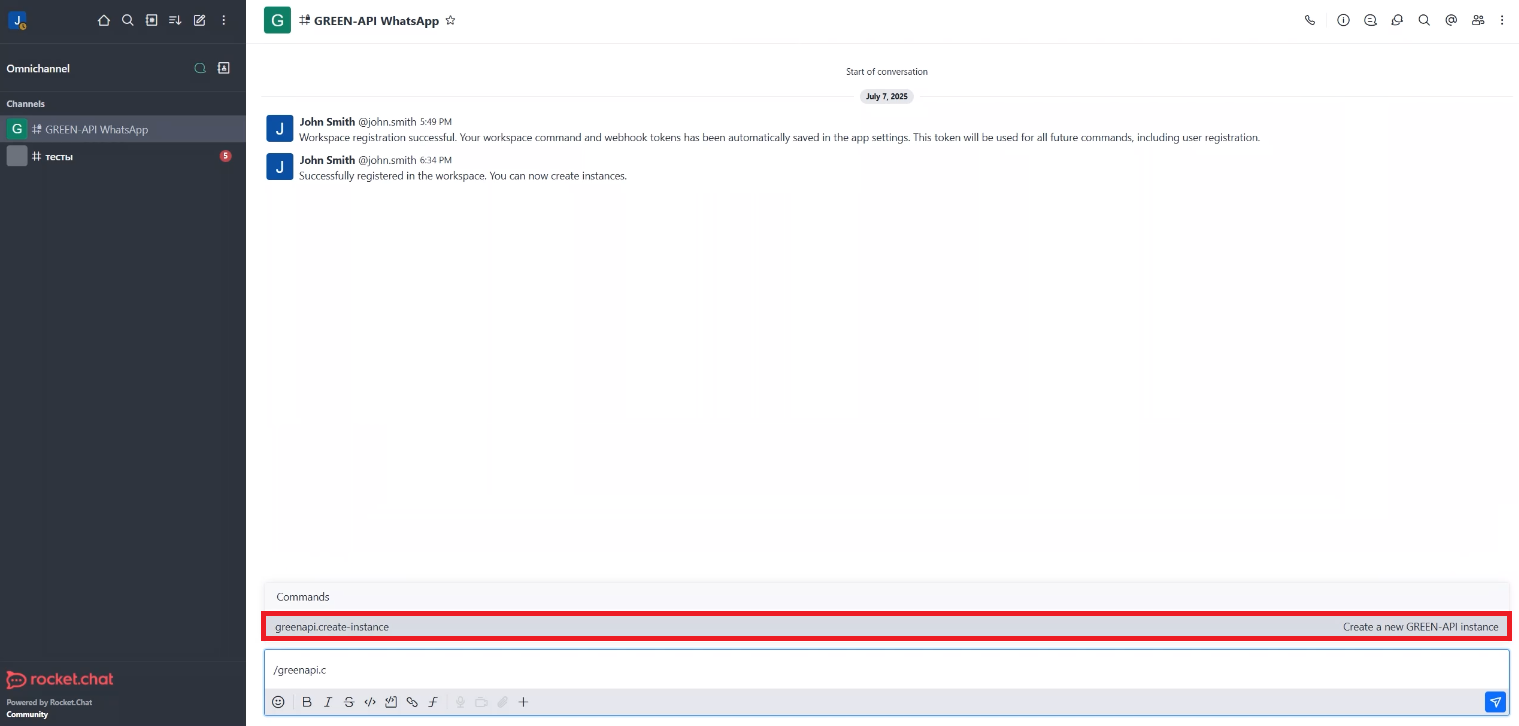
-
Enter the arguments:
- As the first argument, enter the instance ID (idInstance).
- As the second argument, enter the instance token (apiTokenInstance).
Step 8. Connecting the instance and getting started#
- After running the command, you will see a message about the successful creation of the instance. You need to wait about 5 minutes for the settings to be applied. This instance will be associated with the agent who created it.
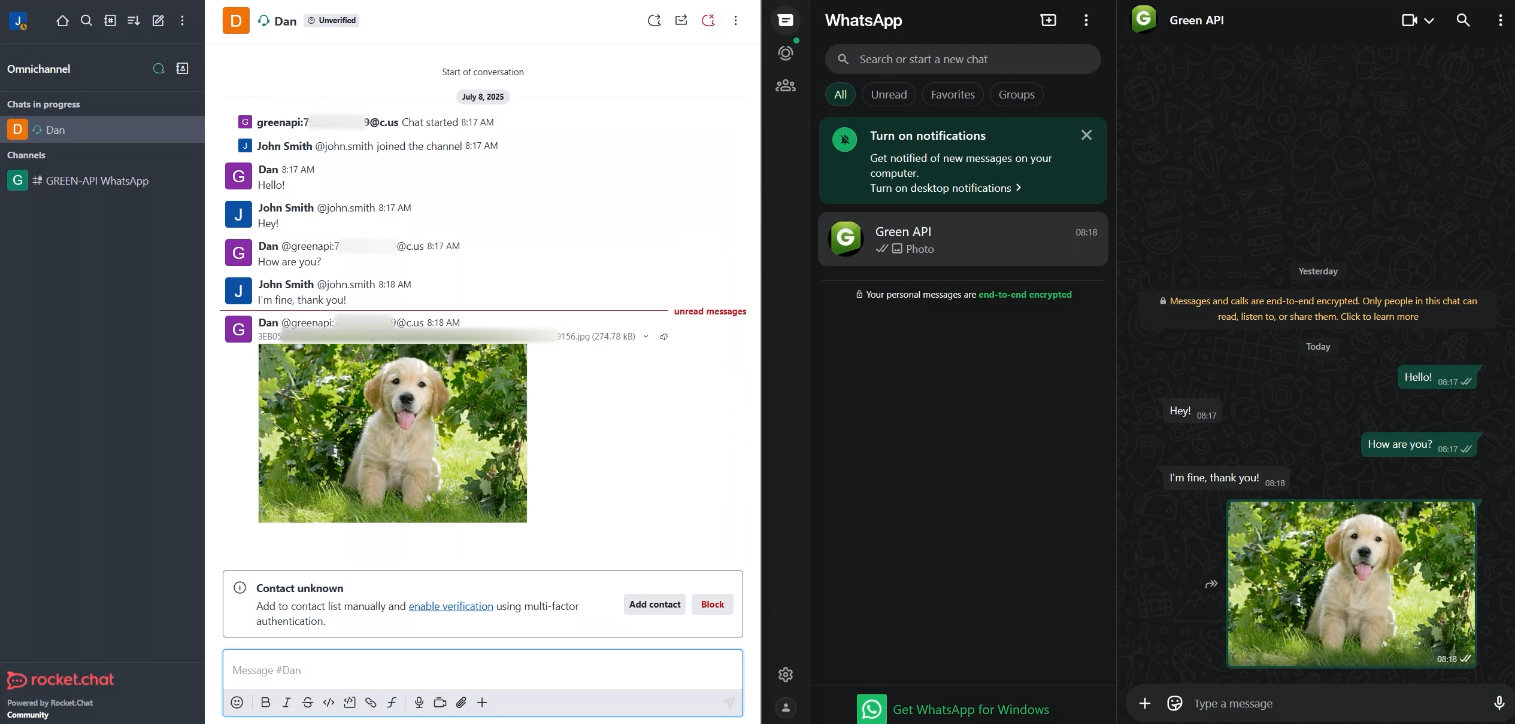
- Now you can receive messages from WhatsApp and communicate with customers directly from Rocket.Chat!
-
You can send text, emoji, files and other types of messages.
Conclusion#
By following these simple steps, you will be able to integrate WhatsApp into Rocket.Chat using GREEN-API, create and connect a GREEN-API instance, and start managing customer communications effectively. Workspace administrators have access to additional commands, which you can read about in the documentation on our website.
GREEN-API is always happy to help you integrate WhatsApp with other platforms.