How to send files#
Information
MS Excel integration version 2.0 with advanced functionality, description of all the features below in the article.
If you only need to send a mailing and get the status of sent messages, use the Lite version
To send files, follow these steps:
1. Getting started#
- Open the
API Methodswindow and fill in theParameterstab according to the instruction

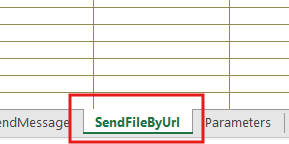
- Go to the
SendFileByUrlsheet
2. Fill in the columns:#

Column C - Chat ID (Client number)#
The cells in this column indicate the numbers of the message recipients.
- To send to a personal number, specify chatID (phone number in international format)
- To send to a group, specify groupID.
How to quickly export contacts from an account?
To automatically export contacts to the table:
1. Open the API Methods window
2. Open the Send Files page
3. In the Upload Contacts cell, select the required option:
- "All Contacts" - all account contacts (groups and personal chats) will be uploaded to the table
- "Personal Chats" - all account personal chats will be uploaded to the table (groups will not be uploaded)
- "Groups" - all account groups will be uploaded to the table (personal chats will not be uploaded)
- "Previously Had a Chat" - all contacts with whom there was correspondence will be uploaded to the table
- "Saved" - all contacts saved in the account's contact book will be uploaded to the table
4. Click the Export Contacts button

Column D - Chat ID (personal, group)#
Filled in to determine whether the ID in the cell on the left is personal or group.
- If personal number is specified on the left, then write personal in the cell
- If group is specified on the left, then write group in the cell

Column E - Url file#
Link to the file being sent.
The maximum size of files sent is 100 MB.
List of file formats that are successfully sent and received via the API
How do I get a link to a file?
To get a link to a file, click the API Methods button and open the Parameters sheet. At the bottom of the window, click the Upload file button

After selecting a file from the device, the Completed window will appear. Click Copy link to copy the received file address.

Paste the link into the cell of column E - File Link
When receiving a link via a table or using the UploadFile method, the link expires in 15 days.
After 15 days, the link will become outdated and the file will not be sent via it.
Column F - File name with extension#
File name with its extension.
Examples: file.docx / photo.jpeg / picture.png / sheet.xlsx / voice.mp3 / song.aac
Column G - Caption#
The column is not mandatory for sending files
The cells contain the text of the message being sent.
A line break in a cell is formatted with the \n symbol
Optional columns: A, B
- Column A - #
Filled in for clarity of the row serial number.
- Column B - User (Name, Email)
Filled in to identify the specified numbers by name, email or other data.

Enable number verification if necessary#
To check if a number has a WhatsApp account, open the API Methods window and enable the Check number checkbox

The function only works for checking personal phone numbers and does not check the existence of groups.
For this reason, do not enable the checkbox when sending to groups or when sending to personal numbers and groups on the same sheet.
After sending messages, you will receive the status false or true:
false- means that the number does not have a WhatsApp account or there is an error in the number;true- means that the number has a WhatsApp account.
3. Start sending#
After filling in all the required cells, open the API Methods window on the Send Files page and click the Start mailing button

After starting sending, columns G, H will start filling in each row.
If number verification is enabled, column F will also be filled in.
After sending is finished, a notification window will appear. Do not turn off the table until this window appears.


If you added numbers to a table that has already been sent, then after the start the mailing will start with the added numbers, and not from the beginning of the table.

Possible errors

Fill in the instance parameters according to the instructions

The instance is not authorized. You need to connect the instance to your WhatsApp account

Check the correctness of the data entered in the table:
- The number shall be specified in international format
- There shall be no spaces or line breaks in column D. Only personal or group
- The text shall be formatted according to rules
How to stop sending#
To stop sending, click Stop sending on the Sending files page

- To clear the queue of messages to send, click
Clear Queueon theSending Text Messagespage. - You can check whether there is a queue on the instance in the console using the showMessageQueue method.
We recommend clearing the queue before starting the mailing.

Column F - Availability of WhatsApp account
The cells indicate the presence/absence of a WhatsApp account on the number.
The function only works to check personal phone numbers and does not check the existence of groups.
For this reason, do not enable the checkbox when sending to groups or when sending to personal numbers and groups on the same sheet.
To perform a check when sending, check the checkbox in the API Methods - Sending Files window

Column G - Message Status#
The cells indicate the message status. Possible statuses:
Message sent- the message was successfully sentMessage NOT sent- the message was not sent
Column H - Response body (message id)#
Contains the message ID if sent successfully and a description of the problem if there was an error.
- In case of sending:
idMessage - In case of an error:
Whatsapp account missing
Message statistics#
To check the status, you need to enable notifications in your personal account.
It may take up to 5 minutes for the new settings to apply.

If the user has disabled the notification of reading messages, then you will not be able to find out whether the message has been read.
Open the API Methods window and on the Sending Files page, click the Message Status button

Possible statuses:
Sent- the message has been sentDelivered- the message has been sentRead- the message has been readMessage not found- the message is in the sending queue or has been sent to a non-existent account
To update the statuses of sent messages, click the Update statistics button

You can learn more about the statuses in our article "What are the message statuses in WhatsApp?"
How to delete sent messages#
To delete messages sent from the table:
- Open the
API Methodswindow - Open the
Sending Filespage - Check the box next to the
Delete Messagesbutton - Click the
Delete Messagesbutton

After deleting, the "Done" window appears, and the message status changes to Message deleted

How to quickly clear a sheet#
To clear the current sheet:
- Open the
API Methodswindow - Open the
Sending Filespage - Check the box next to the
Clear Tablebutton - Click
Clear tablebutton

After deleting, the "Done" window appears, and the message status changes to Message deleted

How to add contacts to a group#
To add numbers to one group:
- Create a group from your device or via the API using the createGroup
-
Fill in the C column - Chat ID (client number)

-
Open the
API Methodswindow - Open the
Sending text messagespage - Enter the ID of the created group in the
Group ID - Click the
Add to group

To add numbers to different groups:
- Create a group from your device or via the API using the createGroup
-
Fill in column C - Chat ID (client number)
-
Specify in column D - Chat ID (group, personal) group IDs, to which you want to add number of each line
You can also add one number to several groups. To do this, write one number in several rows of column C, but specify different groups in column D.
- Open the
API Methodswindow - Open the
Sending Text Messagespage - Click the
Add to Groupbutton

After adding, the "Done" window appears

The H - Response Body column will show the result of adding:
